What is Instantli?
Instantli is a lightweight application by knecon AG that helps you to find without searching. A shortcut is all it takes.
Are you working in your browser, e-mail, or work processing program and need information that matches your current work context? Just press Win + Y (Windows) or Cmd + Shift + X (Mac) and Instantli finds thematically related content – no matter where it is stored and how it is named.
Knowledge thus becomes available to everyone. Instantli.
This brief guide will help you get started.
Install Instantli
Required operating system
Instantli is available for both Windows (min. 10.0.19041.0, x64) and Mac (min. Ventura; arm64, x64).
We recommend using a GPU to ensure a smooth start and speed up the content analysis.
Download
Download Instantli from https://pro.instantli.com.
Double-click on the download file and follow the instructions to install Instantli.
Instantli may prompt you to install Microsoft .NET Runtime. If so, please follow the on-screen instructions to install the desktop application version. The Instantli shortcut will otherwise not work.
You'll be ready to find relevant information on your computer immediately after installation. To add further data sources, please see: Connect Data Sources.
Updates
An arrow button appears in the top right corner of the Windows version (next to the Settings) once an update is available. Click on the button to install the update.
As a Mac user, click on the Instantli icon on the menu bar and next select Check for updates.
Connect Data Sources
After installation, Instantli is ready to find relevant information on your computer. You can connect further data sources from your organization's data universe in order to realize the full potential of the application.
Open Instantli.
Click on the gear icon in the top right corner to open the Settings.
Connect your data sources by clicking on Connect to Account.
You can then choose from a list of connectable accounts and will be prompted to enter your credentials.
Currently available: Microsoft 365. Further sources can be connected upon request.
Click on the toggle in a data source tile to enable/disable the respective data source.
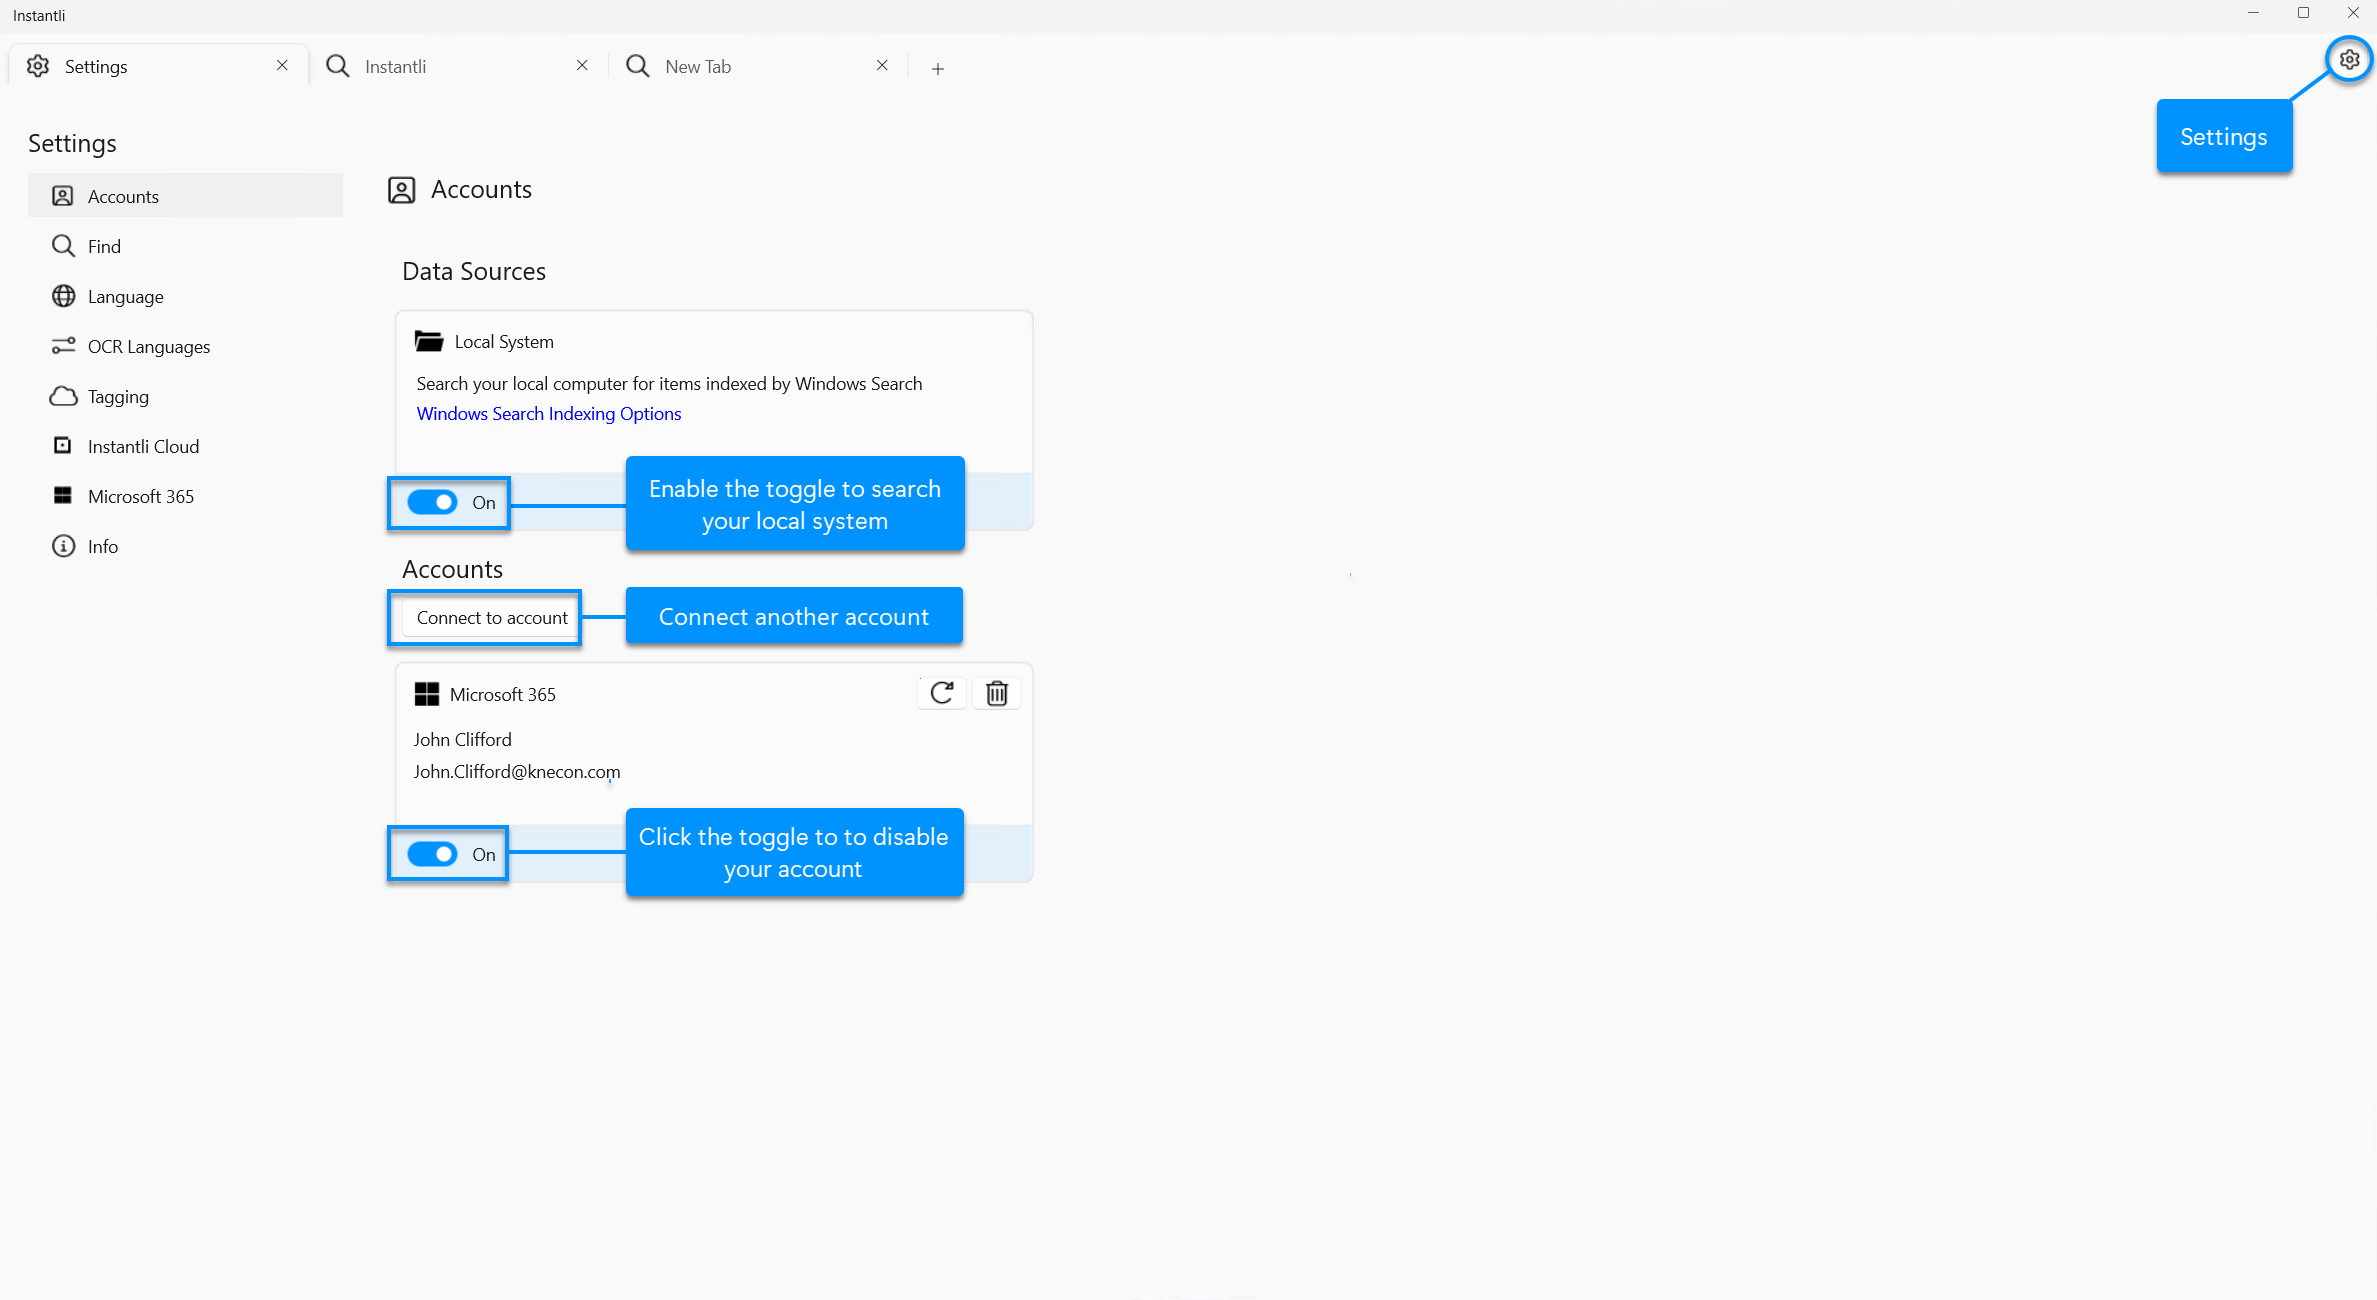
Accounts tab in Settings
Once you have connected a data source, Instantli takes it into account when finding.
Find Relevant Information
How to find relevant information:
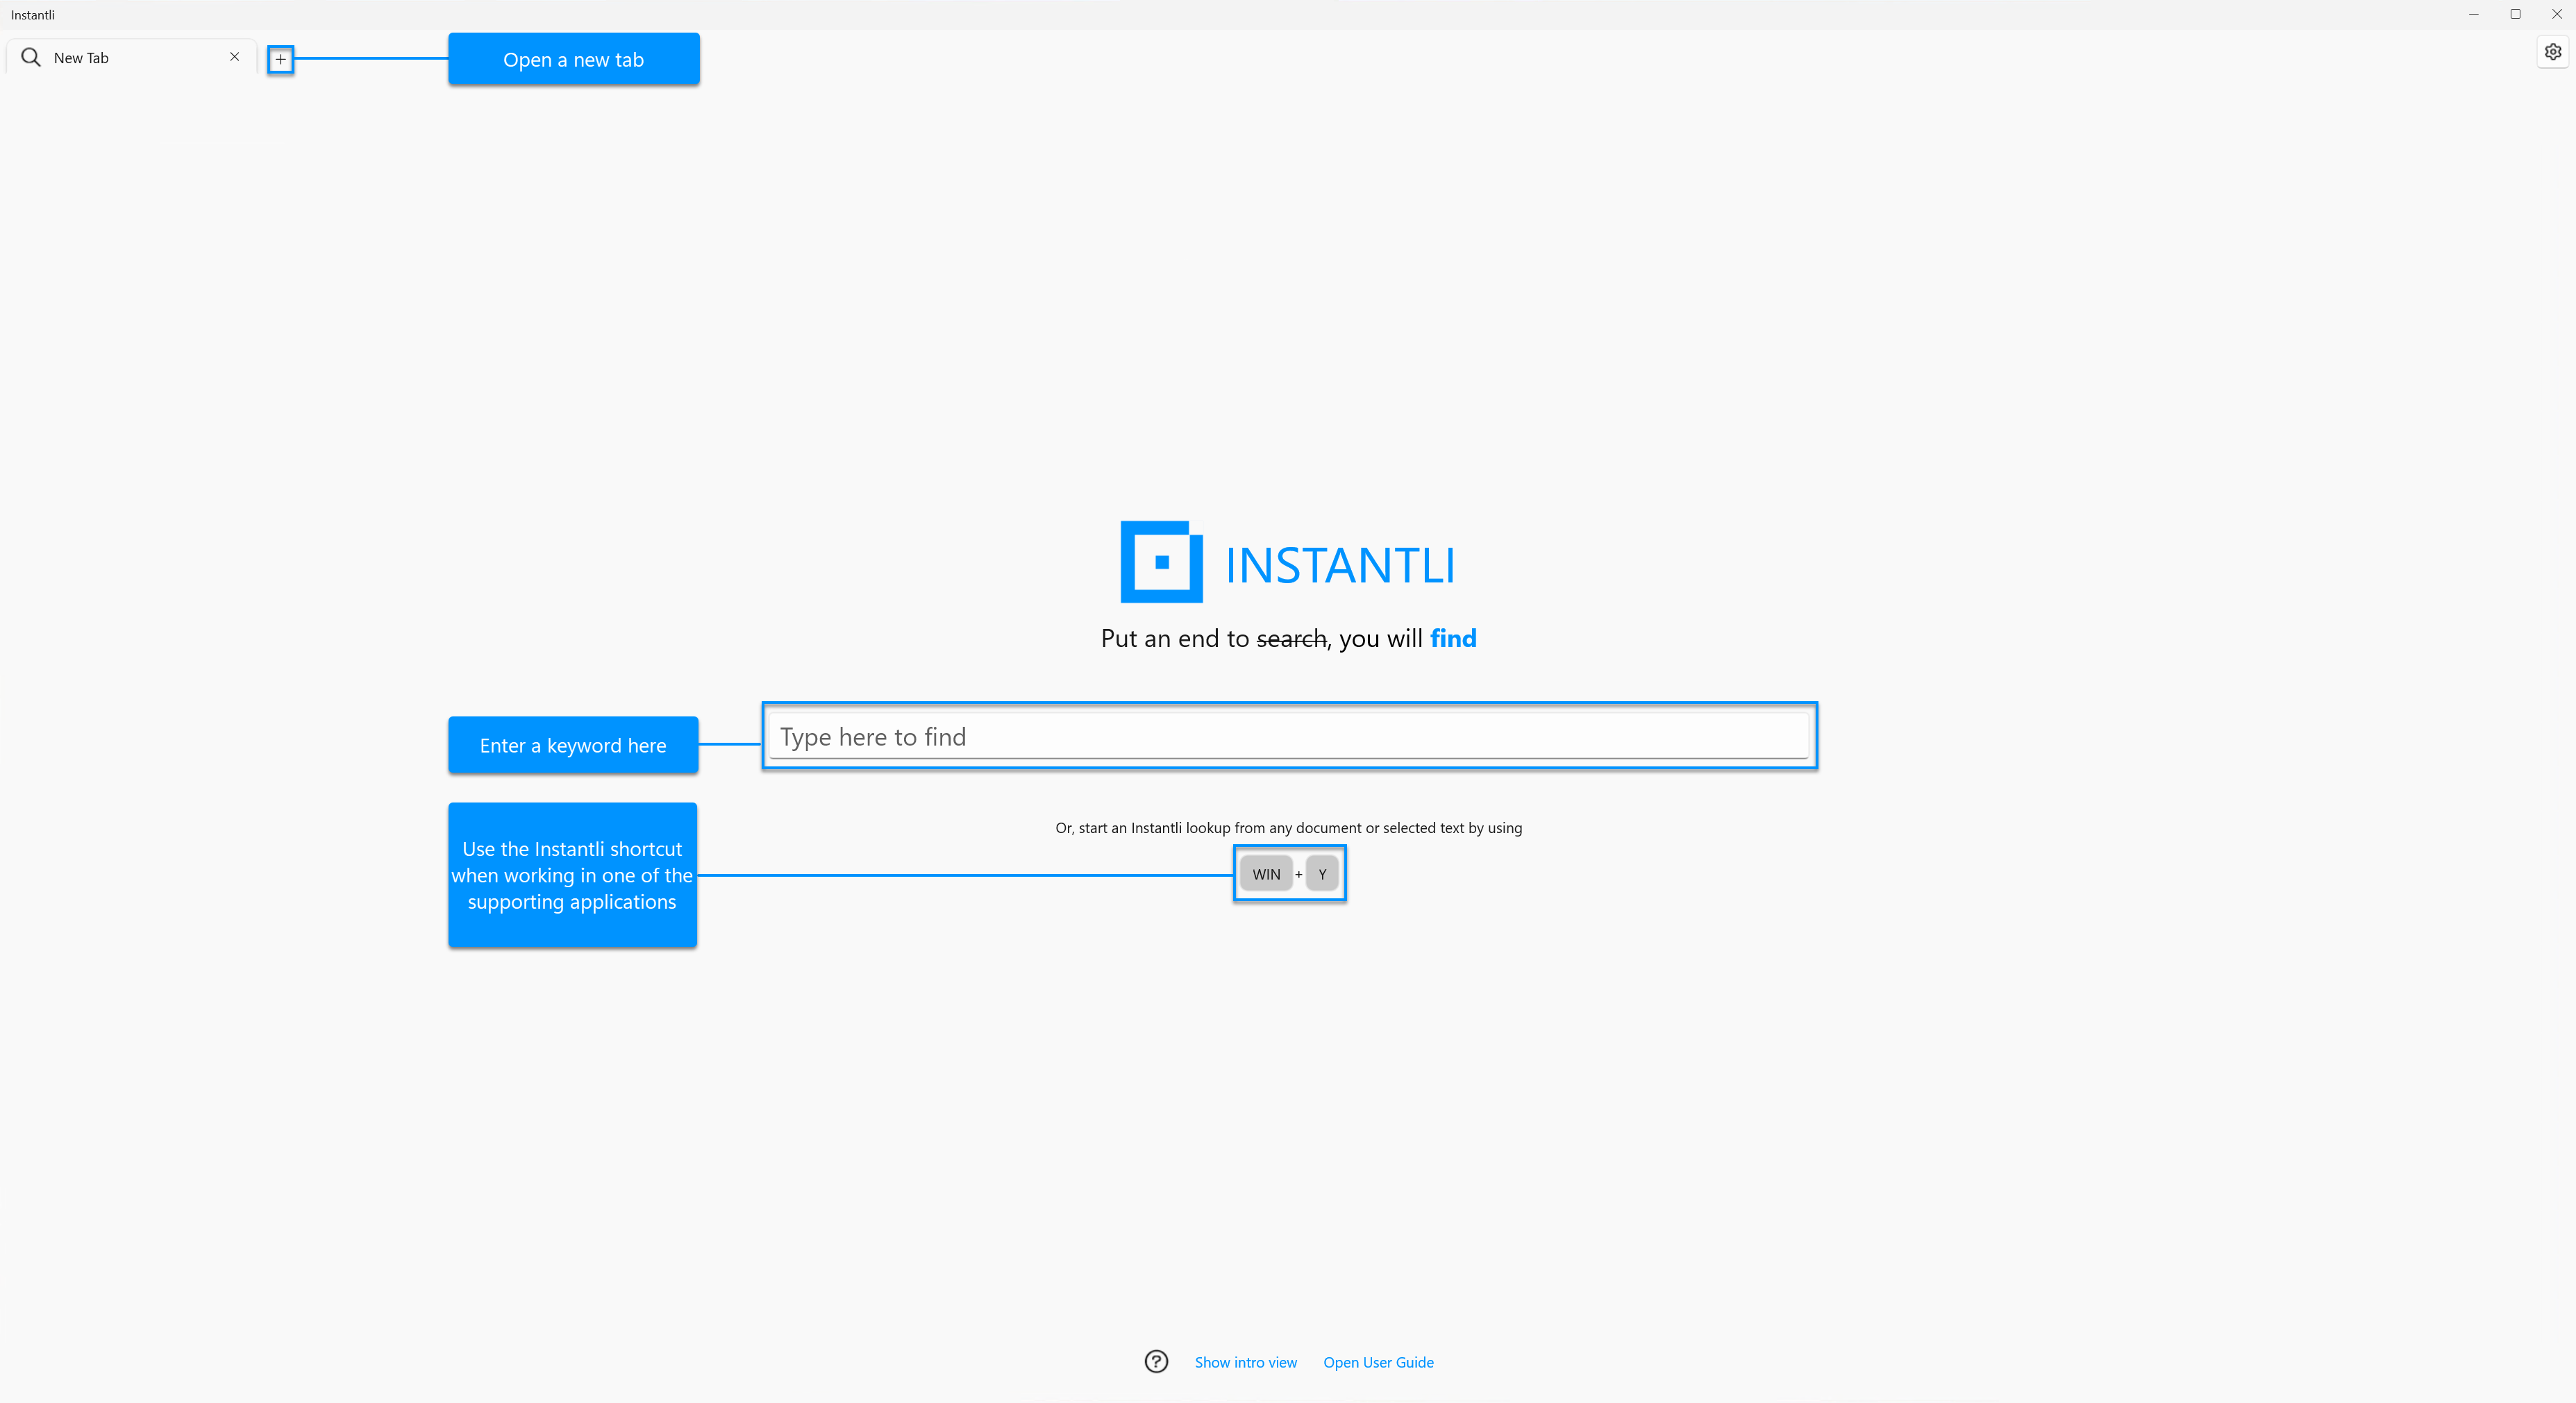
How to find content using Instantli
Based on Context
Find relevant information based on your working context by pressing Win + X (Windows) or Shift + Cmd + X (Mac).
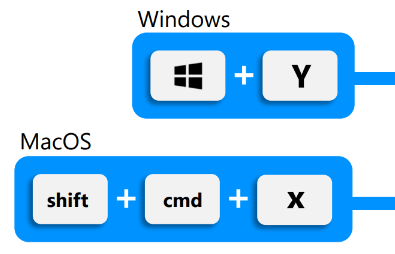 |
Instantli shortcuts
You can:
Start from an application
Press the shortcut when working in a document or supported application. (currently only works on Windows)
Select a file in the file explorer, on the desktop or elsewhere, and press the shortcut.
Start from a text passage
Select a text passage in a supported application and press the shortcut.
Based on OCR
Instantli's Capture text on screen feature allows you to find relevant information based on scanned or non-selectable text.
Shortcut: Win + C (Windows)
As a Windows user, press Win + C to change into the Win + Capture text on screen mode.
A grayish overlay appears on the screen. Next, select the text passage based on which you want to find by dragging a box over it with your mouse.
As soon as you release the mouse button, Instantli will start the OCR and analysis for finding relevant information.
Taskbar/Dock (Windows and Mac)
You can activate the OCR find via the taskbar/dock: Right-click on the Instantli icon in the taskbar/dock of your computer and select the Capture text on screen option.
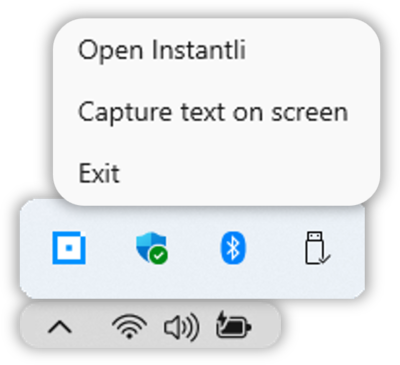
OCR find feature
Based on Keyword
Instantli also offers an in-app find. Type a query into the Instantli searchbar and press Enter.
Keywords or terms
Enter a keyword or term, e.g.:
contract (single keyword)
support contract (term)
Exact phrase
Use quotation marks around a phrase to find files and documents that contain those same words in exactly the same order, e.g.:
"risk management"
"sustainable business growth"
Natural language queries (experimental feature)
The app understands natural language queries (NLQ). Simply "talk" to Instantli as if you were talking to a friend. Try with:
emails from Eddie from yesterday
presentations about enterprise search
Open Multiple Tabs
You can open multiple tabs to find content related to different working contexts—just as you're used to from your Internet browser.
When you close and reopen Instantli, the tabs and results will still be available. In case you want them to be closed and deleted when restarting, enable the Always start with a new Find tab option in the Settings section.
Supported languages and applications
Supported languages
Instantli supports context and keyword finds in the following languages:
English
German
Supported Applications
The Instantli shortcut is supported by the following applications:
Microsoft | Apple | |
|---|---|---|
Microsoft Word, Excel, PowerPoint, OneNote |
|
|
Microsoft Teams |
|
|
Microsoft Outlook |
|
|
PDF (e.g. Adobe, Foxit, etc.) |
|
|
Web browsers (Chrome, Edge, Explorer, Safari, Firefox) |
|
|
Windows Notepad |
|
|
Apple Pages, Numbers, Keynote, Notes |
|
|
Apple Mail |
|
|
Apple Calendar |
|
|
Apple Preview |
|
|


Your Results
Find without searching—your results will be displayed immediately in Instantli, no matter which option you use to find contextually relevant content.
Results List
Instantli lists contextually relevant documents from your data sources in the center of the app dialog.
The blank space on the right is the reading pane where you can (pre)view the documents and files from the result list. It offers web editing support for M365 documents.
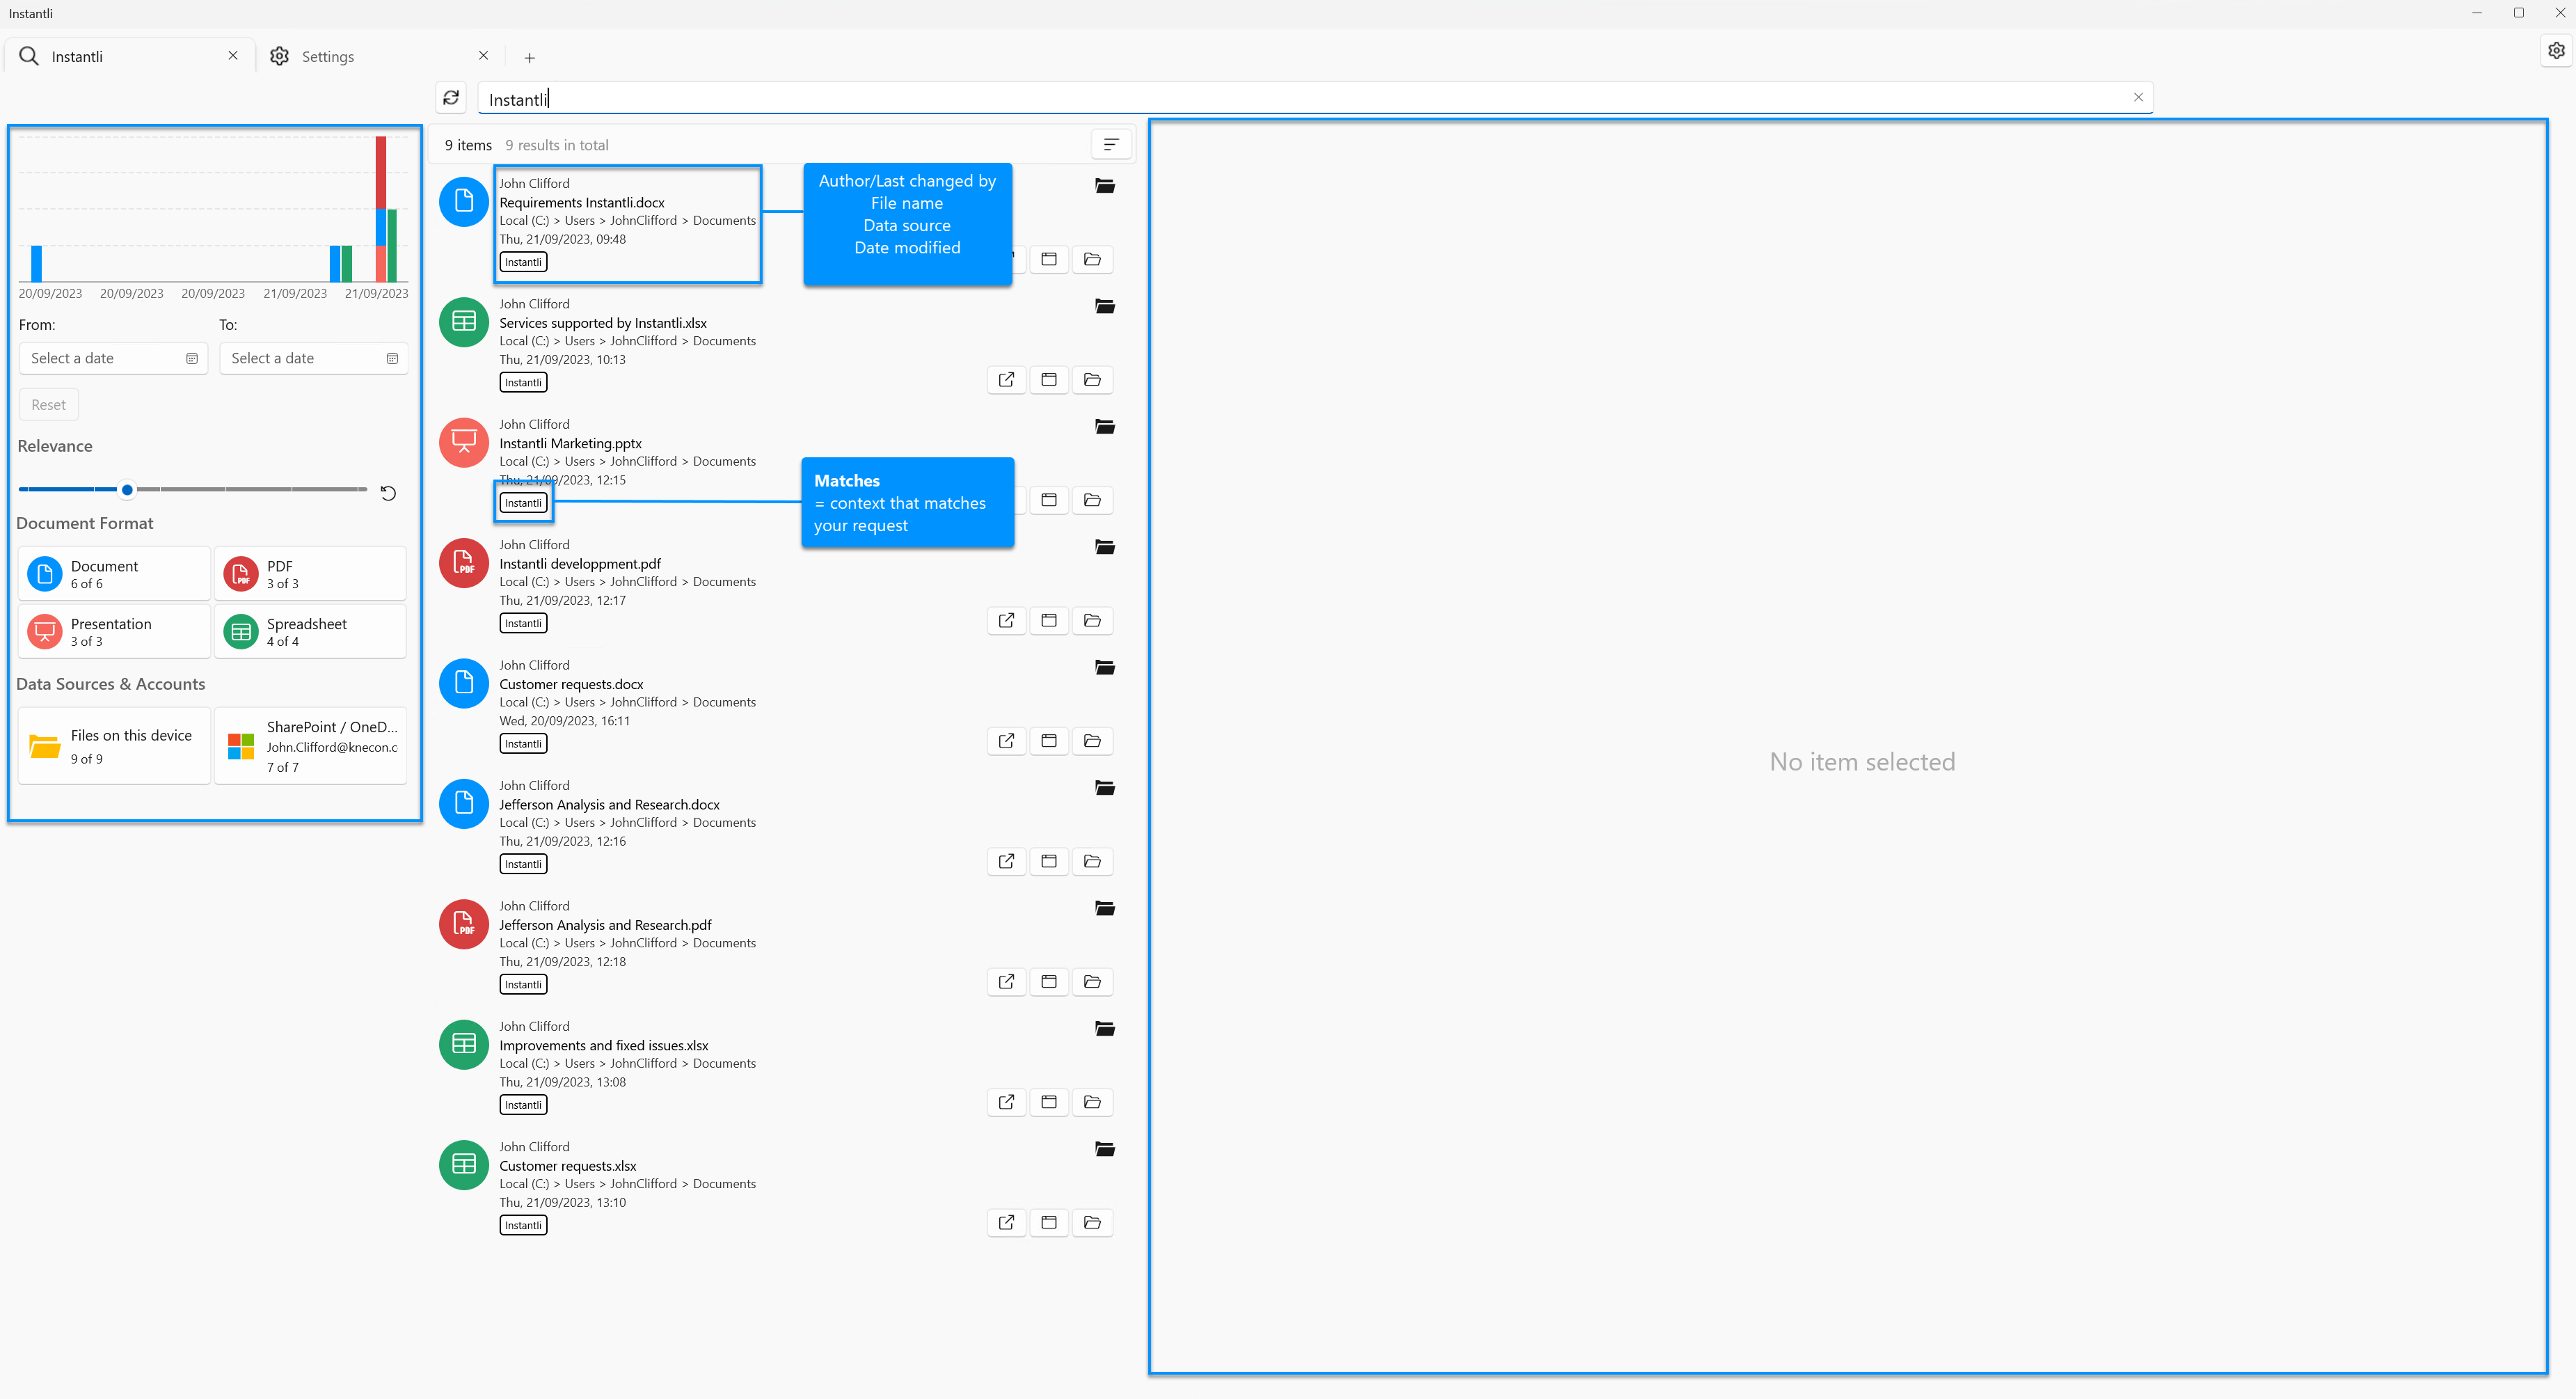
Results list (center), filter options (left), and reading pane (right)
Filter Results List
You can filter the results by date, relevance, file format, and data source.
Filter by date Select an approximate time frame by clicking on a bar in the timeline. The different colors of the bare indicate the different file types. You can also enter a date range by selecting a start and an end date below. Delete the selected date filter by clicking the Reset button. | 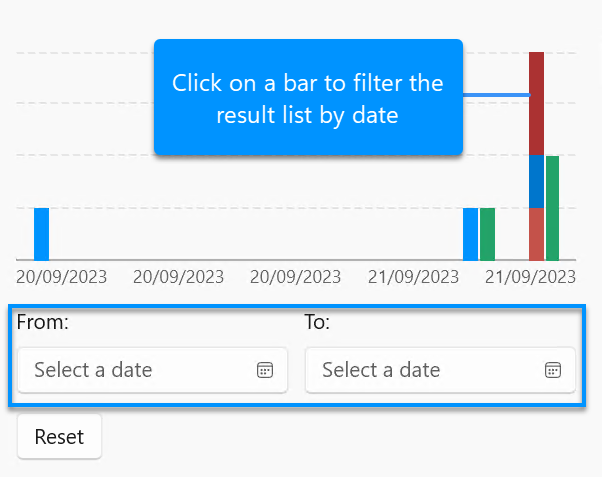 Filter by date |
Filter by relevance Move the relevance slider to filter the results by relevance. | 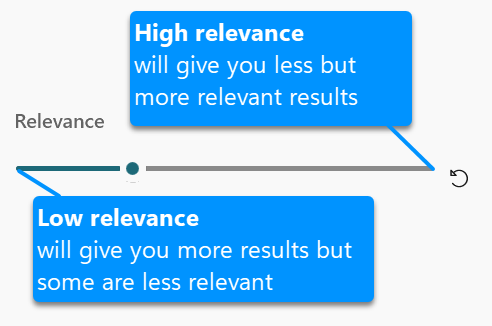 Relevance slider |
Filter by document format Select the document formats you would like to display in your results list. | 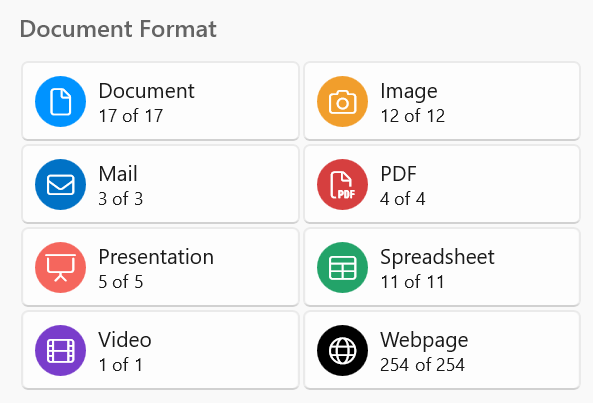 Filter by file type(s) |
Filter by data source Select the data sources you would like to include in the results list. | 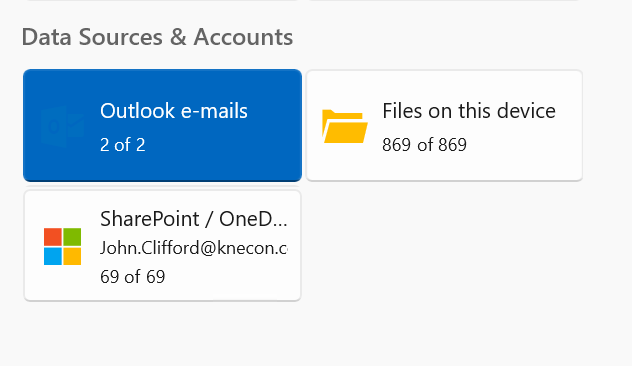 Filter by data source(s) |
Sort Results List
The default sorting of the results list is by relevance. The most relevant results are displayed at the top of the list.
You can also sort by date, starting with the file that has been changed most recently. Click on the arrows at the top right (in the list header) to open the respective drop-down menu.
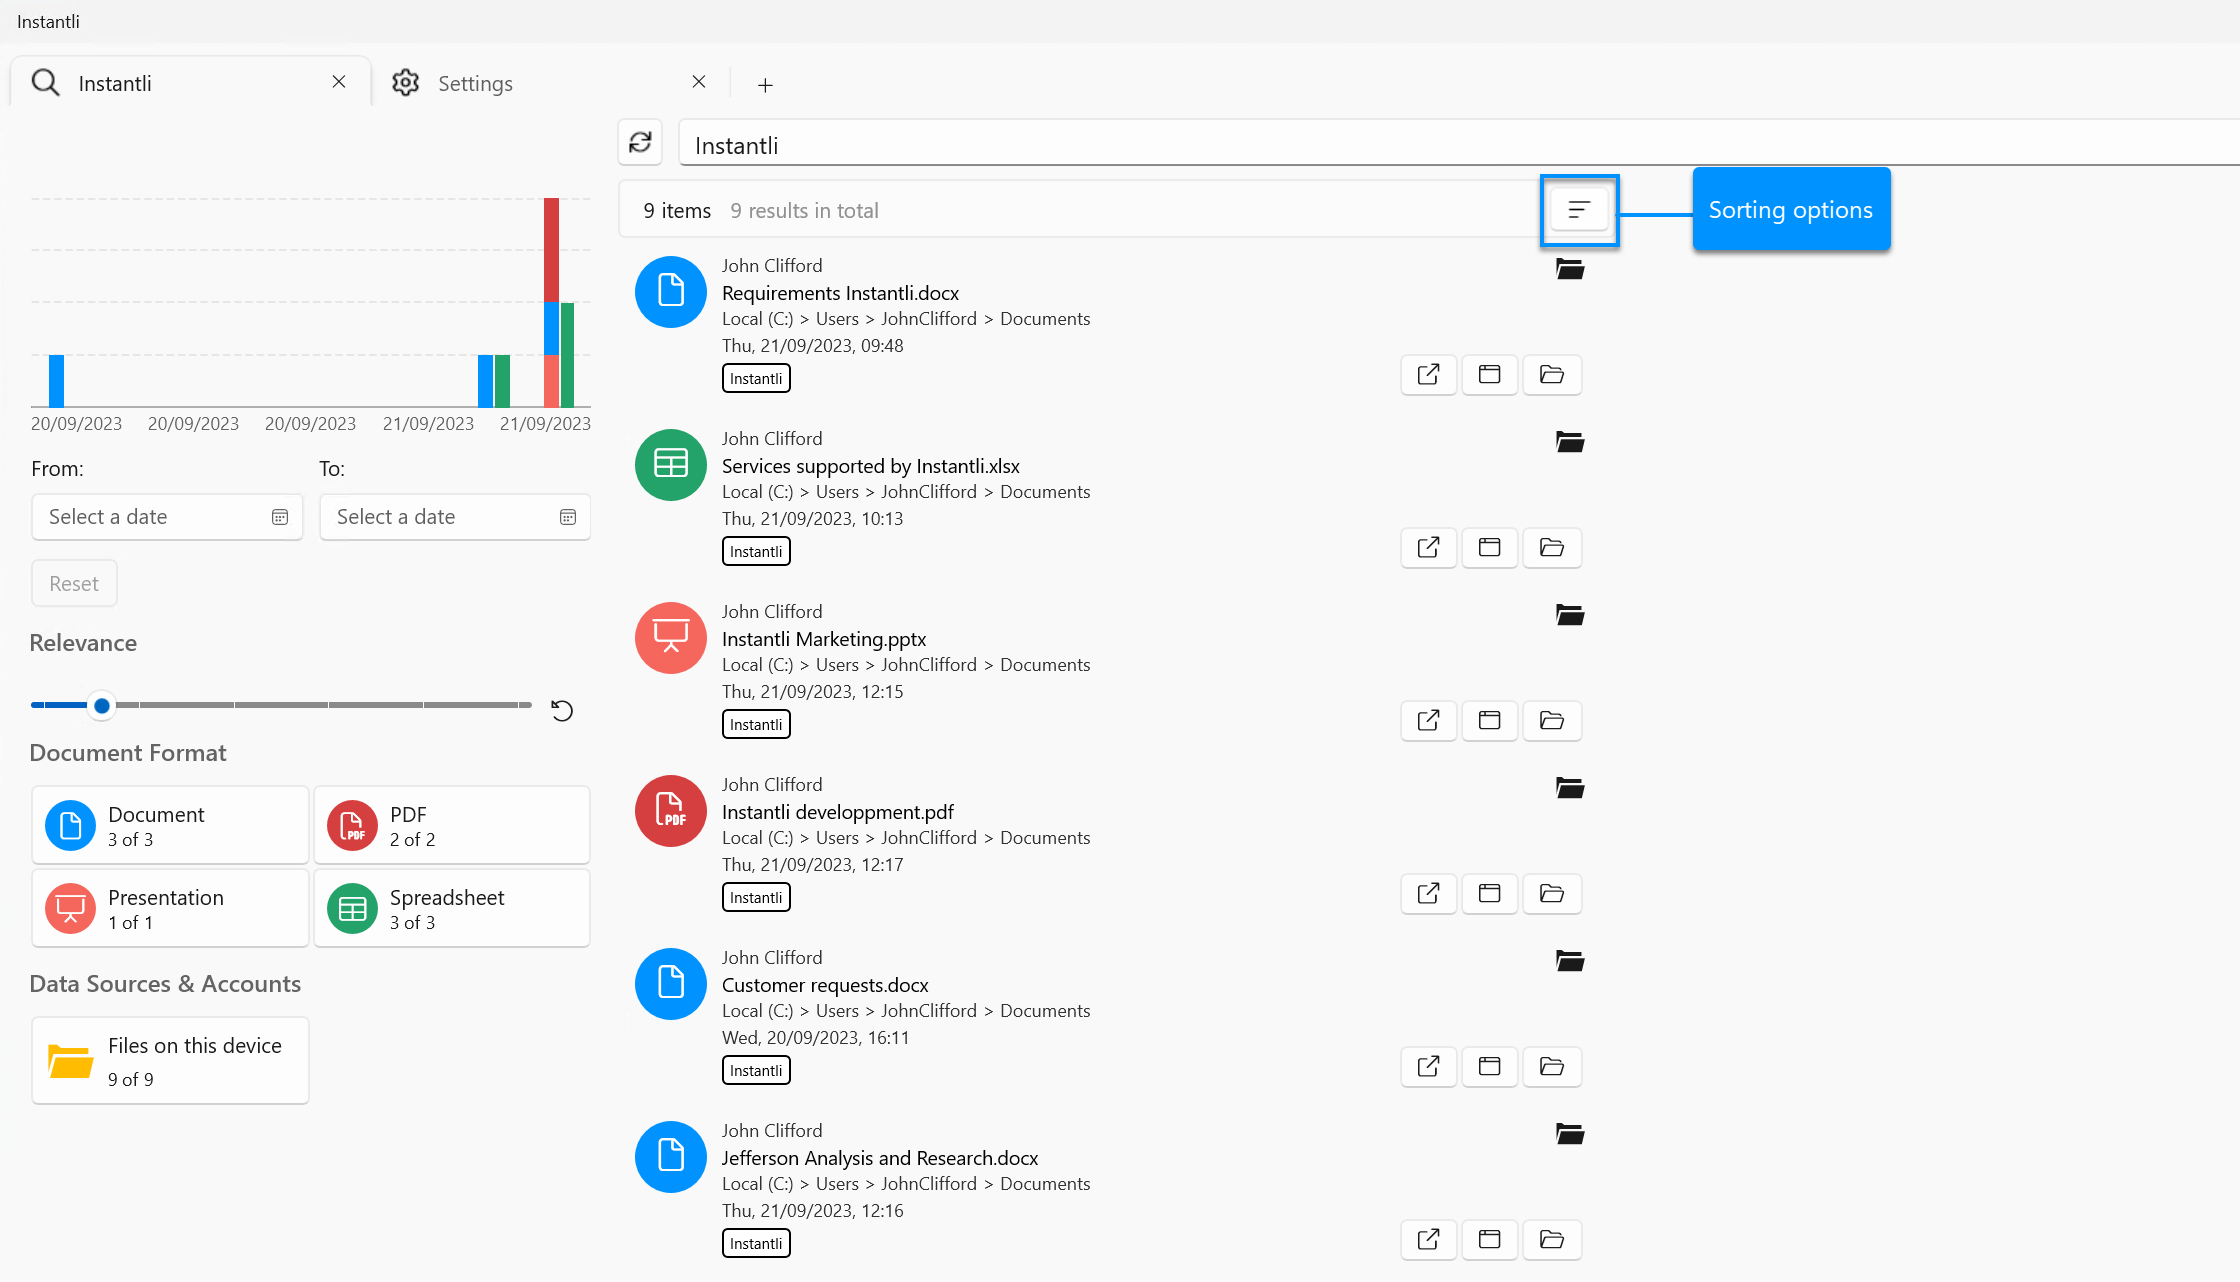
Sorting the results list
Reduce the Noise
Would you like to reduce the noise from irrelevant and outdated content?
Here's how to do it: Sort by date and move the relevance slider to high relevance.
Error Indicator
The search results list header includes an error indicator that is displayed in the event of errors. It shows the number of errors that occurred.
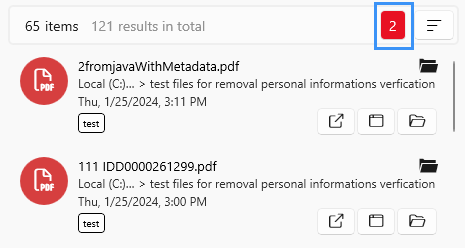 |
Error indicator
Clicking on the indicator opens a drop-down with error descriptions.
View Content
Instantli offers the following options to open and view the contents on your result list.
Open file preview in Instantli
Click on a result in the results list to open it in the preview pane on the right.
The file is displayed in a default reader.
If the Web Apps mode is enabled, the file will be displayed in the Office Web App inside the Instantli preview area. (For further information on these settings, please see here.)
You can only edit files directly in Instantli if the Web App mode is enabled.
Buttons in find results
The buttons at the bottom right of each result offer you additional viewing options. They differ slightly depending on the file type.

Viewing options in result
1
Shows related information for this item
Click on this button to start a further Find based on the context of this file.
A new tab opens. It shows results that match the context of the file.
2
Opens this file in the Office Web App
Click this button to open the file in the browser-based Office Web App.
3
Opens the folder that contains this item
Click this button to open the folder that contains the file.
Further Settings
You’ve already learned how to connect your data sources via the settings section (gear icon in the top right corner).
Further settings you can adjust there:
Find
Set your Find preferences.
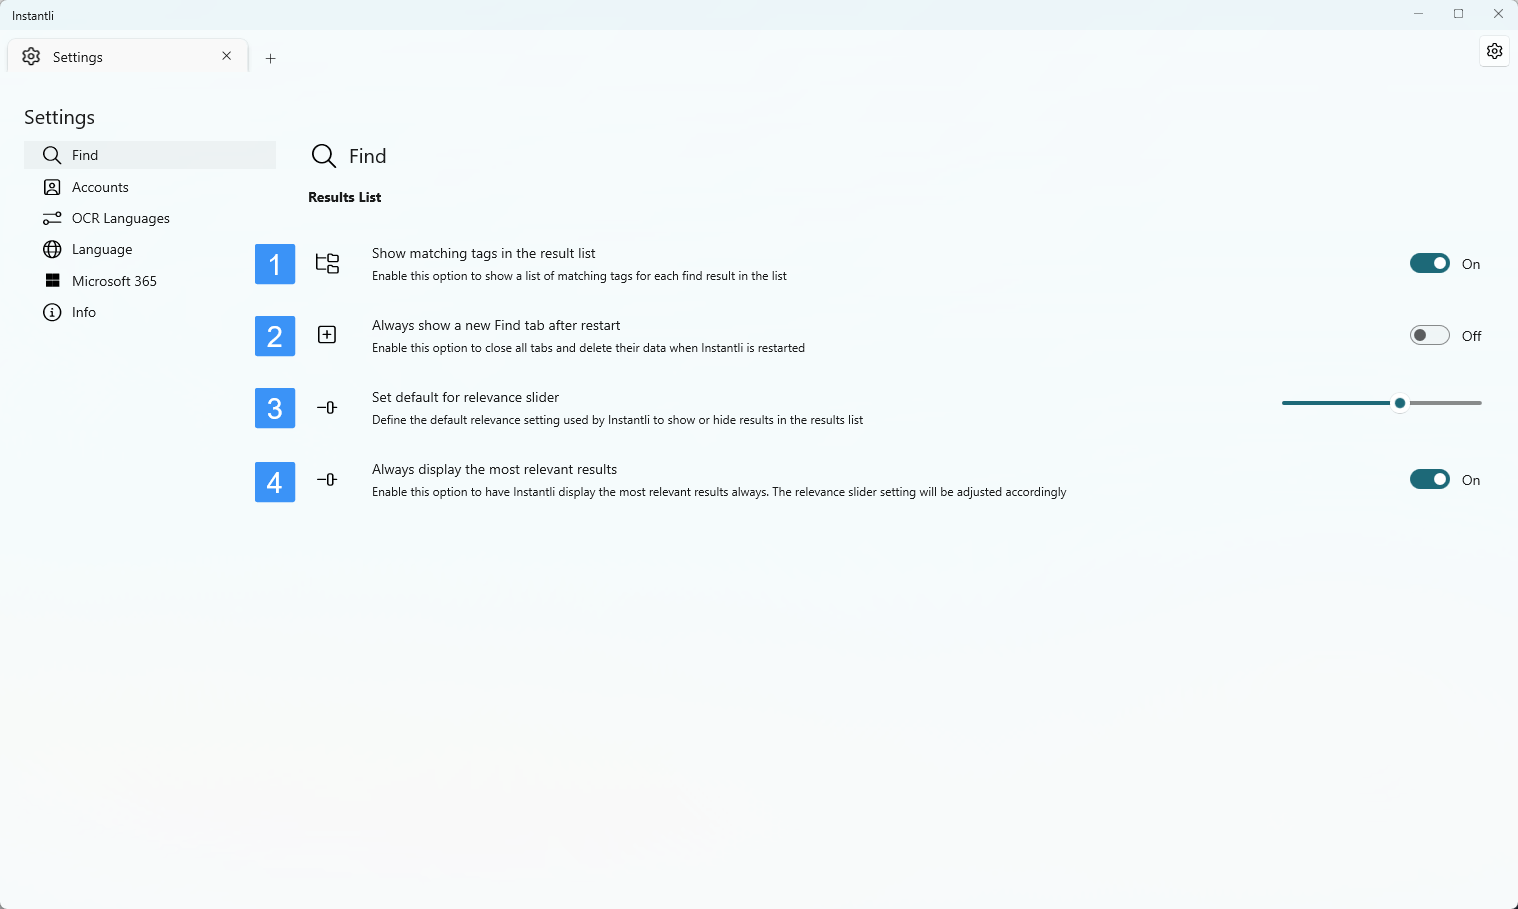
Find preferences
1 | Show Matching Tags in Find Result list Enable this option to display tags that show the context matches between your working context and each result.   Result with context tags (left) and result without context tags (right) |
2 | Always show a new Find tab after restart Enable this option to close all open tabs and delete their data when Instantli is restarted. |
3 | Set default for relevance slider Define the default setting for the relevance slider in the filter options. |
4 | Always display the most relevant results Enable this option to have Instantli display the most relevant results always. Instantli will then display the most relevant results even if they do not match your relevance setting. The relevance slider setting will be adjusted accordingly. |
Language
Select the app language.
Available languages: English, German.
OCR Languages
The OCR find feature (Capture text on screen) currently supports German and English. Both languages are enabled by default.
If you do not use the OCR find, you can also disable one or both languages to make the app run faster.
Instantli Cloud
Decide whether to enable the web preview for Instantli Cloud documents.
Microsoft 365
Set your preview preferences for Microsoft 365 documents and Teams messages:
1 | Web Preview for Microsoft 365 documents Decide whether you want to use the Office Web Apps to display files in the preview pane. If you enable the Office Web Apps, Microsoft Office files will be displayed in the respective Microsoft Office Web App. That means you can also edit the files (the same look, feel, and features as the Microsoft Desktop apps). |
2 | Microsoft Teams Message Limit If this option is enabled, the number of Microsoft Teams messages returned on a find will be limited. The option is enabled by default. The limitation makes the context analysis run faster. |
Info
This section offers information about Instantli, the libraries used by the app, and the release notes of the current and previous app versions. You cannot adjust any settings here.
About Instantli
Instantli was developed by knecon AG, Suracherstrasse 17, 8142 Uitikon, Switzerland.
Copyright © 2023 knecon Technologie GmbH.